


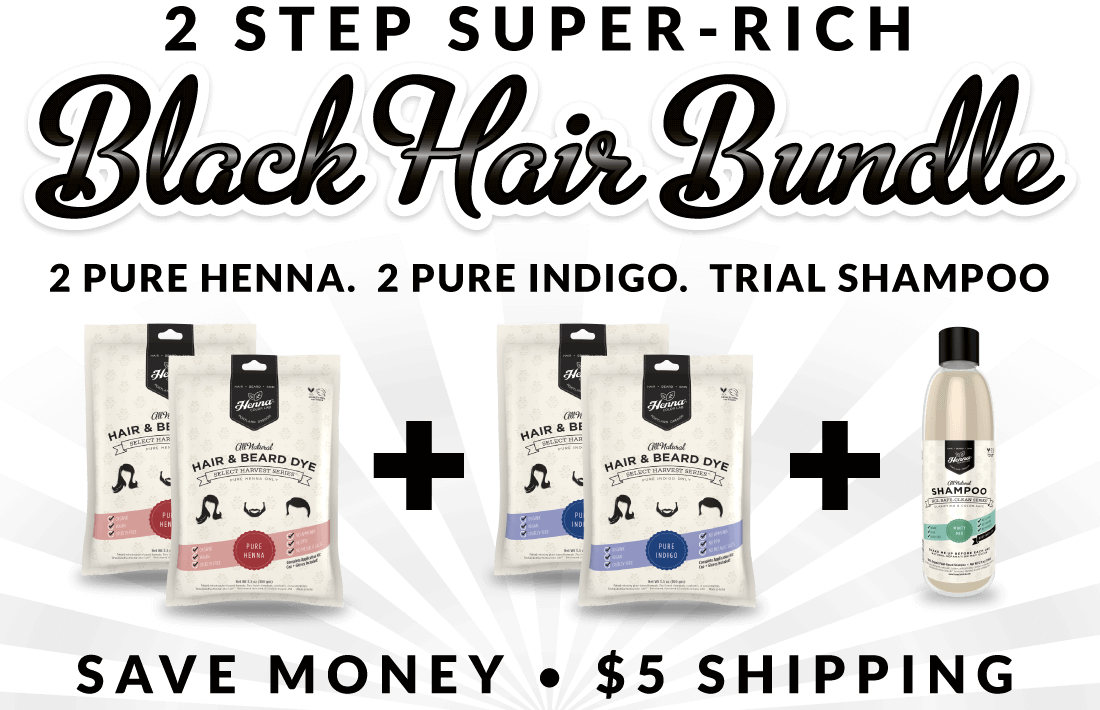
2 STEP Super-Rich Black Hair Bundle


From: Original price was: $56.90.$44.98Current price is: $44.98.
Ships Today: 11 hours 36 minutes
This bundle provides you with the best products to control the complete experience. Get the Safe, Organic, All Natural, Expected Results—that you want.
How To Use This Bundle
Step 1) Organic Clarifying Shampoo: Lather Up & Wash Well.
- Wash hair twice with our organic, deep-cleaning, sudsy shampoo before coloring.
- Flash-lathers and gets down to the scalp. Lifts away all unwanted dirt & oil.
- Minty essential oils chill, clean, and flex the follicles—your hair is ready for color.
Step 2) Apply Pure Henna: Set the Base & Prepare the Canvas.
- Apply the Pure Henna to your squeaky clean hair. Wait set time. Rinse.
- Sets the warm-colored base and begins entry into the hair protein.
- Henna primes the hair and allows Indigo to bind richer, deeper, & darker to hair.
Step 3) Apply Pure Indigo: Bring on the Dark Side.
- Apply the Pure Indigo to your freshly Hennaed hair. Wait set time. Rinse.
- Deep cool-hued blue pigments fuse with the warm henna base.
- The result? Long-lasting super-rich jet black hair. Healthy. Radiant.
*see step-by-step application in “How to Apply” tab below
HEY!—We included enough for a couple applications (shoulder length hair).
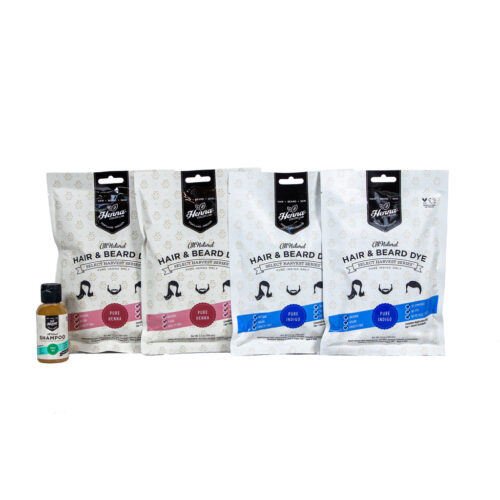
THIS 2-STEP RICH BLACK BUNDLE INCLUDES:
- Simple, methodical instructions.
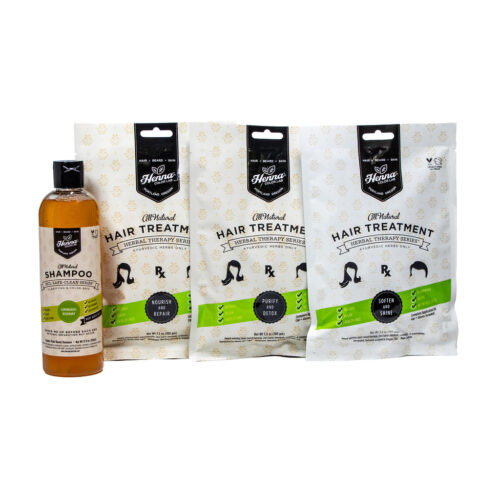
- ONE organic trial-size shampoo (Safe-Clean Minty Mix™).
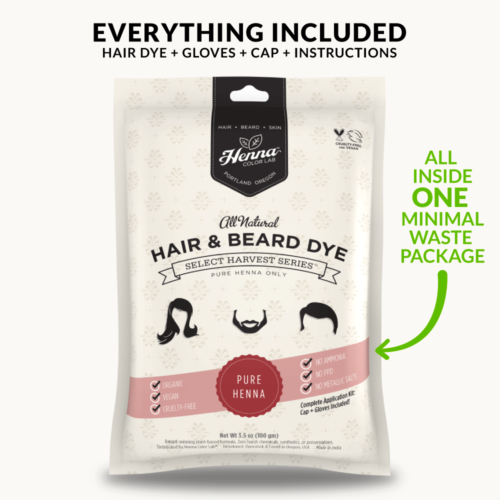
- TWO Pure Henna Hair Dyes.
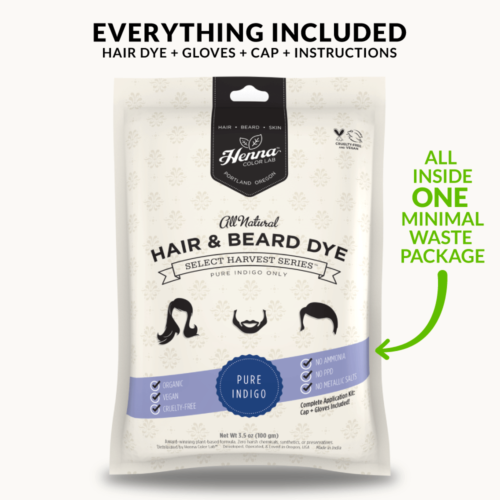
- TWO Pure Indigo Hair Dyes.
FIVE Awesome Products for ONE low price.
PLUS! FOUR Cap & Glove Sets—Everything Included.
A complete 100% Natural System that richly blackens any hair type or color.
Products Sold Individually: $56.90
YOUR BUNDLE PRICE: $44.98 (Over 20% OFF save $11.92)
PLUS flat rate shipping only $5! (cheaper than driving to the store)*
*Orders shipped within U.S. only.
| Ingredients | Henna and Indigo only. |
|---|
How To Apply
2 STEP SUPER-RICH BLACK BUNDLE APPLICATION INSTRUCTIONS
STEP #1: APPLY PURE HENNA
A. MIX & PREPARE
- Use quart size mixing bowl per 3.5oz packet(100g) and a spoon to mix.
- Cover any surfaces that may stain: untreated wood, carpet, fabric, etc.
- Pour HENNA powder into bowl. One packet colors straight, shoulder length hair (approx).
- Add hot, not boiling, water (approx 122º F) gradually to the powder.
- Note: There’s no exact amount of water to add. Add little at a time to get an applicable paste consistency.
Similar to pudding or ketchup consistency. - Prepare hair for dye treatment. Divide hair into four sections: Front, L&R sides, Back.
B. APPLY COLOR
- Apply directly to hair using gloved hand or hair dye brush.
- Using gloved hand, scoop & apply the paste on back section (if crumbly, add water).
- From root of hair, work evenly to top of hair. Try for complete, even coverage.
- Methodically apply from back to front section. Take your time. Massage well into hair.
- When done, cover head with included plastic cap. Leave on for 1 hour.
- Note: Longer = Deeper Color, Better Conditioning.
C. RINSE OUT HENNA (*NO CONDITIONER FOR HENNA RINSE PHASE. CAN INHIBIT INDIGO ABSORPTION)
NOTE: If very thick curly hair, you may require conditioner to help rinse out dry henna (use light-weight conditioner).
Rinse out conditioner completely before adding Indigo.
GO RIGHT TO APPLYING INDIGO (nearly identical process)
STEP #2: APPLY PURE INDIGO
A. MIX & PREPARE
- Use quart size mixing bowl per 3.5oz packet(100g) and a spoon to mix.
- Cover any surfaces that may stain: untreated wood, carpet, fabric, etc.
- Pour INDIGO powder into bowl. One packet colors straight, shoulder length hair (approx).
- Add hot, not boiling, water (approx 122º F) gradually to the powder.
- Note: There’s no exact amount of water to add. Add little at a time to get an applicable paste consistency.
Similar to pudding or ketchup consistency. - Prepare hair for dye treatment. Divide hair into four sections: Front, L&R sides, Back.
*TIP: Add 1 Tbsp of Sea Salt to Indigo mix. Can help stubborn hair with Indigo adhesion & assimilation
B. APPLY COLOR
- Apply directly to hair using gloved hand or hair dye brush.
- Using gloved hand, scoop & apply the paste on back section (if crumbly, add water).
- From root of hair, work evenly to top of hair. Try for complete, even coverage.
- Methodically apply from back to front section. Take your time. Massage well into hair.
- When done, cover head with included plastic cap. Leave on for 30 min to 1 hour.
- Note: Gray or stubborn hair, leave on for full hour.
C. RINSE & CONDITION
- Rinse out thoroughly (NO Shampoo) until all product removed.
- Then use conditioner.
- Note: Be patient. Rinsing may take a little while. Conditioner will help removal.
- Blow dry hair for 10-15 minutes to accelerate natural color-changing process.
Remember: It’s natural, no added perfumes. The pastes have earthy plant-based scents.
You can add fragrance oil or personal perfume to hair after completely rinsed out & blow-dried.
- Avoid shampooing for 24 hours. Avoid leave-in conditioners for at least one week.
- Henna/Indigo will take up to 36-48 hours to express true colors and undertones.
- Undertones can range from green to blue before fully maturing. Very normal.
- If you missed spots or messed up, you can reapply as often as you like. It’s 100% natural!
22 reviews for 2 STEP Super-Rich Black Hair Bundle
Add a review
Related products


Erica –
I was looking everywhere for a hair color that was not full of toxins and chemicals. I have coily African-American hair and I wanted something that would cover my grays while also giving a rich jet black color.
I had given up the search until I found this site. I ordered the 2-step because I wanted to make sure I got the best coverage possible.
Instructions were super easy to follow and I am LOVING the results. My hair feels strong, it’s shiny and it’s completely covered my gray hair. No chemicals necessary! I will definitely be ordering more and have shared with my friends as well. Highly recommend!
Stephanie –
So pleased with the amazing results of the Henna Color Labs Black Bundle. I’m African American with mid-back length hair. My hair is 3c/4a in texture. In other words, I have thick, easily tangled curls with a distinct curl pattern. My hair was getting damaged by using chemical dyes, even the best of the bunch and demi rather than permanent dyes caused hair line and deep temple-area breakage and hair-loss. I’m so happy with the Black Bundle, I’m immediately ordering more. Who knows in this new world, maybe others will love it too and so much that it runs out.
lea cordoba –
I have colored my hair one time in my life about 30 years ago.
Just over a year ago I started to get a lot of white hairs all of a sudden. Prior to April of 2020 I had few enough that I could pull them out as needed. I tried Hairprint to attempt to restore my color when they first popped up. I did a double treatment which was very messy, time consuming, expensive and all for nothing. My white hairs did not change in color at all.
After that I decided to wait and see how they would fill in, I would not mind having all white hair or some cool white stripes. After 14 months I did not like the way the random white hairs looked against my very dark brown, almost black hair. I have been searching for the right natural product. Many of the “natural” products I would find had many other ingredients that were not so natural. I am somewhat familiar with Henna, but had never used it. I know many Henna products out there are not pure and was unsure who to try. I came across Colorlab and felt like they would be a good place to purchase from. I bought this bundle hoping to cover the white. I have very thick, coarse, wavy hair past my shoulders. One package of each was enough, I actually had a small amount of the Henna left over. I followed the directions that it came with, I did not add anything else to the Henna, I also did not mix Henna and let it sit for hours. There are so many suggestions floating around about how to prepare Henna. I did 2 hours of the henna, rinsed, then 1 hour of indigo.
You need to be prepared. Start early…preferably on your day off! Get everything prepped and ready. I lined my bathroom floor and counter with newspaper. I cut out holes in a garbage bag to wear to help protect my clothes (one for each process). You still want to wear something old that can be stained underneath. The entire process is lengthy and a little messy, be patient. From the start of prepping to the end of blow drying was about 5 hours. WORTH IT! It came with gloves and a cap, but they are pretty thin. I used the gloves with a thicker pair over them. I also used the cap, but put a plastic grocery bag tied at the back on top of it. The Indigo will start to drip after about 25-30 min, especially at the neck line. Put an old towel or some paper towels to help catch the drips.
I decided the best way to rinse my hair was to go outside in my back yard and use the garden hose. I used the flat setting which has a wide pattern but also a lot of pressure. I rinsed until it ran clear after each application. I then came in and rinsed more with warm water in the shower ( a little more came out after each process). After the indigo, I did use a little conditioner to do the final rinse. I towel dried, waited about 10 minutes and used the blow dryer as suggested for 20 minutes. NO MORE WHITE!
It has been less than 24 hours, and I guess the color may still darken a little. I am thrilled with the color so far, looks very much like my natural color. It will take a few days for the oils to return and for some of the frizz to relax (happens every time I wash anyway) but it looks really shiny. I can’t wait to see how long it lasts and how it will be to touch up roots as they come in.
I think the time involved and the mess is totally worth it to not put toxic products in my hair. The smell of the Henna was light and earthy, the Indigo reminded me a little of being in a horse stable and perhaps some skunky weed. Smells better than toxic fumes.
Shipping was fast.
Thank you COLORLAB
KW –
I’m a Polynesian-Asian-Haole mix with typical very dark, kinda bushy, long Polynesian hair. I’ve been using the dark brown, but wanted to give the black a try because the dark brown didn’t quite color my grays exactly as I would like. This two-step process to get black does take some time, and this first application that I did was on top of three dark brown applications I did over the course of 6 weeks or so. I have maybe 10% gray hair (maybe more) with a lightning streak in the front and this first application of black worked perfectly. It’s not a harsh unnatural looking black, but exactly the color that my dark hair grows out of my head. I’m so happy. For those unhappy with a first or second application, I think it just takes a number of applications to get the color right if your hair has any gray or is very light.
I did 2 hours of the henna, rinsed, then 1 hour of indigo. It’s totally worth knowing I didn’t put poisonous chemicals on my skin, hair, and in my home for my kid to breathe. No fumes. No stink. Indigo does have a mild earthy smell, but it’s not too bad. I can’t smell the plain henna.
Also fast shipping. Thanks!!
Glenn G –
First the good: The product did not cause allergic reactions, and the 2-step process yielded a much darker result than a single color. Then the not-so-good: The whole process took almost 3 hours; it is a lot of trouble. After applying the 2nd color, I got a noticeable green cast that lasted nearly 2 days before finally fading into the almost-black I was aiming for. The vendor will probably try to tell me what I did wrong, and might even decide not to post this review, but I don’t have this problem with other brands of henna coloring. I have decided it is too much trouble, and I don’t want a green beard for 2 days afterward.
Alys –
My hair is light brown with grey and I’ve been using the dark brown and natural black mixes in an attempt to get that nearly black dark brown, but because my hair is so light, I need multiple applications and even then it will only go to a medium brown at my roots. I’ve been using henna in general for many years and Henna color lab for the past 2. Henna color lab is the easiest to use and the most reliable. I know what I’m going to get when I put it on. So, I decided to take the plunge and try the 2 step process. I’ve been apprehensive because I used to use pure henna and my hair was soooo orange! I’m pleasantly surprised that I don’t see any red after the indigo and my hair turned that perfect color I was trying to get. Looks like I just needed more henna for the indigo to bind to. While I don’t love having to do a 2 step process, it definitely beats multiple applications of the same product and still not getting my hair dark enough!
Becky –
Turned my black hair red and it became increasingly more brassy after several days. I followed the instructions. Total waste of time and money
lonihiatt1234 –
Long story short I absolutely love Henna Color Lab, in no small part because of their amazing customer care. I’d recommend it to anyone.
I’ve been using their hair colors for a year now, from dark brown to mahogany to natural black, and I’ve learned a lot. First of all henna is a miracle for split ends and shine. Second, it’s an absolute mess and a pain to apply (worth it R.I.P my tub). Third, my hair hates indigo. I had a huge problem with it running off on everything I owned turning everything, including me, blue. Because of this the first time I tried the Natural Black color it barely turned my light brown hair a shade darker, and the second go I had to endure watching the beautiful cherry black disappear tragically fast.
This story has a happy ending though! I knew the problem wasn’t damage because my hair is virgin aside from this year of henna fun and the fading starts at the roots where my hair is obviously freshest. It also wasn’t running from heat or sulfate shampoo because I don’t use those anymore. Plain and simple some hair just hates indigo. So I put my faith in the company and sent an email asking for help. They got back to me scary quick and recommend this kit plus a few tricks to really get that indigo to bond. Over a month after I’ve used the kit and I can definitely confirm their advice was just right. I experienced minimal run off and the color is beautiful. It’s not jet black for me but a deep cherry black that shines and shifts in different light. And as always, my extra long hair looks so healthy from root to tip.
Thank you Henna Color Lab, and to everyone trying this happy hennaing and don’t give up!
Stephanie –
Love it!!! My hair is shiney and soft!!
Cara –
I have been dyeing my hair once a month for 25 years using chemical dyes and needless to say my hair is fried, my hair started falling out and my scalp itches. Dermatologist prescribed medications and a laser cap for hair loss with no improvement. I started researching dyes and found black dye contains the highest amount of PPD, and many people get hair loss from it. Glad I found Henna Color Lab as a first timer to henna because they have been super responsive to my questions and the product is superb. My roots are ash blonde with some gray, so I was skeptical this kit would even get me to brown. I added apple cider vinegar to the henna step 1 to release the pigments, let the bowl sit overnight (smells like fruit leather! Not bad at all) The henna has a soothing effect on the scalp and no itching afterwards, I did get a little red staining on my scalp but you can just rub off the dried henna on your face & hairline so there’s no face stains. My blonde roots turned red orange which is normal. The indigo step I mixed sea salt in and let sit for 10 min before applying. I was amazed the roots are a very dark brown or natural black. Not jet blue black like I hoped, but if it means my hair won’t fall out now then I can live with natural black. I had to use a lot of conditioner after indigo because my hair was like straw. The trial shampoo is also extremely drying.
I will be using henna from now on, because I already noticed less hair loss after coloring, but I still need to work on getting the cuticle healed from years of damage. Hoping the scalp and hair will heal with time. Wish I tried henna years ago! I had no idea there were other colors besides red.
Noelle –
I started using henna to cover gray in my hair about 1yr ago. I have gray mostly up front. I don’t like the time, expense, or heavy use of chemicals that would be required with chemically processed color. Henna Color Lab was the answer for me.
I originally started out using medium brown, and it made the gray less noticeable. The gray became orangey, more like a highlight.
I moved on to using the 2 step process for better coverage. And it was indeed a better balance for me. I am about 10% gray. I left the pure henna on for 1 hr, the pure indigo for 1 hr too. It came out great!
My hair is shoulder length, naturally curly, a tiny bit coarse, so rinsing out can take awhile. To cut down on the amount water used in the process I have found it better to rinse in the tub. I just slide down, put my head back, and massage my scalp. It’s a bit akward, but I never could get a great rinse in the shower with my type of hair. Totally worth it for me.
Good luck with your hair journey ladies & gents!
samanthadasent1 –
I am a black women with very thick, curly, very dark brown hair. I was starting to get come greys and didn’t want to use harsh chemical dyes as I have worked hard to grow my hair out this thick. I used this Super-Rich Black Hair bundle and loved my results. A few suggestions for others though: (1) this process is a bit messy. I would highly suggest getting a squeeze application bottle and cutting the tip so that the product can flow freely and you can have more control over the application process. (2) As the directions say, it could take up to 48 hours to see the full results. I would suggest, as do the instructions, to leave the henna on for the longest recommended time as the indigo needs to bind to it to create the jet black look.
The back of my head came out jet black because I started my application there and used alot more henna then I did in my front. Really drench your hair with the stuff to get an even coating.
All in all I liked my results. I will need to do another application as the front of my head is not completely jet black like the back. So happy this is natural. Please be patient though with the darkening process. 48 hours tops. Best of Luck!
Monica –
Truly 5 stars. I have brilliant white hairs sprinkled in my naturally black hair, and the two step covered them all beautifully. This was the first time I’ve colored my hair myself, and the process wasn’t too onerous. The henna mixed up well (I used lukewarm water and a healthy squirt of lemon juice, then applied plastic wrap to the surface and let it sit for about an hour while I washed my hair and got prepped). It applied very evenly even though there appeared to be big chunks in it. I left it in for 2 hours and the color was dark red and beautiful on the white hairs, pretty enough that I almost stopped there! The indigo smelled like peas, and had a crumblier texture after mixing with water (hot tap water and a pinch of salt this time). It still went on pretty easily, but definitely was much messier, leaving blue all over the sink and bathtub (it scrubbed off no problem). I left that on for one hour, but found that it started “melting” after about 40min (dark blue liquid was rolling out from under the cap, very messy!!), requiring a towel around my neck. It was also much harder to rinse out, but the conditioner helped get most of the leftover crumbs. The finished color was a nice even black, not too dark, and very natural looking. The indigo smell did hang around for a couple of days, which I didn’t particularly enjoy, but overall, I was very pleased with the kit. Shipping was fast, and customer service answered my application questions within 10min!
Joy Davey –
I am Asian with long, very thick and very very course black hair. I am a believer for this 2-step process for rich black hair. My stubborn silver gray here is no more, atleast for awhile, cant’ wait to see how long they last. I applied the henna first as intructed. After I washed the henna and dried my hair, I thought oh my god, my gray hair is yellow orangy, but after I applied the indigo, all my gray hair are now black. It totally covered my gray hair 100 percent. This is a keeper, but I will still use the other color like dark brown to cover my gray hair when I feel like having brown color on my gray hair. Thank you henna color lab.
Alayna –
This kit is perfect. The whole process was way simpler than I anticipated because I actually kept to the recommended leave-in times. I used the wine red henna four years ago and the color was brilliant but the process of rinsing out was miserable. I realize now, that was because I left the henna in my hair OVERNIGHT. Not a good idea, people.
Anyway, I followed the instructions this time around. The rinsing was SO much easier and the deep natural black color is just as brilliant! Since I have breast-length curly hair, I had to use the whole kit at once, and I found the indigo more difficult to apply than the henna; simply because it was grainier. Since my hair was a burnished blonde color before this process (my natural color is medium/dark brown), I was worried the end result would turn out a bit green, but it doesn’t look green at all! There are certainly little light reflecting strands in there, but you can only see them in direct sunlight. The rich black is EVERYTHING!!
All in all, it was definitely a longer process than standard hair dye box kits, but the health, color, and shine my hair has afterwards is SO worth it. A wonderful product indeed!!
Seema –
I’m Indian with dark brown, almost-black hair that’s now, sadly, going gray. I want to stay all natural and, if possible, inexpensive (henna color lab is both!). I tried the “dark brown” mix and liked it–very nice color, but my grays were looking kind of light red/brown (better than white!). So I bought the two-step black bundle. Wow! Just like that, all grays are completely gone, right to the root. The color is still warm and brownish, not jet black as I had feared. I left the henna on 2 hours and indigo on an hour, and I may next time only leave the indigo on for 30 min (to make it a little more brown, less black still). Since my grays are in the front and top of my head, I don’t have to cover ALL my hair, so this bundle will last me a while. And it’s super conditioning. I added a little lemon juice to the henna, and some salt to the indigo. With straight hair, I don’t use conditioner to rinse it out, just water. I’d upload a pic here if the finished hair if you guys had the capability!
Lylah –
AWESOME PRODUCT! I went with a henna + indigo treatment because I have naturally sandy-brown hair, and wanted an extremely dark shade approaching black, but without looking fake, flat, and cheap like many dark commercial chemical colors. This gave me the perfect dimensional deep brown/black, and it looks natural! I’m so pleased! Will definitely be using this again, and maintaining the current shade.
EJ –
I’m Asian, and started to have gray hair since I was in high school and now in my mid 40s the gray has grown more and started to bother me a little bit. I started coloring my hair about 3 years ago with henna and nothing else. I’ve used the block henna but it only covered my grays about 50-60%. Today, I used the 2-step Black Hair Bundle and was very pleased and excited with how it came out!!! My gray is pretty much gone !!!! I know I’ll be using it again and will recommend it to my friends! The downside is the mess with applying it but compared to the block henna, this was easier to prepare and apply and a lot easiers to rinse off. THANK YOU FOR SUCH A GREAT PRODUCT!
F C –
I’ve used henna and chemical hair dyes over a number of years. I’ve never been happy with results using henna (I’ve tried regular henna and also pre-made “bricks” from a competitor). I’m also not at all happy about using toxic chemical hair dyes either. However, from an autoimmune illness my hair had become grey overnight (yes, this does happen despite what others say). It was a sudden onset of pre-mature greying. My co-workers and classmates reacted in shock to see this new appearance. Even strangers would approach me to comment because I’m young and they cannot believe that hair can be so grey. I didn’t want to dye my hair but from the number of times people would comment, it started taking a toll on my self esteem. First I started dying it only three times a year, then it became more often. My hair started thinning out, scalp becoming damaged, and hair rapidly becoming more grey. It got to a point where I had been dying my hair 1-2 weeks because the color would just fade. After my last chemical hair dye treatment, I decided enough was enough. I researched what could contribute to pre-mature greying (underlying celiac’s disease or gluten sensitivity, high sugar consumption , enzymes http://www.ncbi.nlm.nih.gov/pubmed/15623346 ) so I recently started on addressing those areas. But, my hair still needed help. I stumbled upon Henna Color Lab, watched numerous YouTube videos on henna and decided I was going to give henna another try. I first prepared the Hair Color Lab henna, mixed with coffee instead of plain water and apple cider vinegar and let the mixture sit over night. I applied the henna and rinsed it out after 3 hours. I was so shocked at how orange my hair was, even more so shocked just how much grey hair I actually have (it’s 50% grey). I looked like a pumpkin and was on the verge of tears. I prepared the indigo mixture immediately after washing the henna out. The indigo was on my hair for 2 hours. The mixture turns green to blue, blue like you would not believe. It’s kind of cool. I was afraid of the results would be after I washed my hair, feeling immensely hopeless. But, once I removed the towel from my head I was SO surprised. I really couldn’t believe that my pumpkin stained all white hair has turned into a lustrous shade of black. It covered the temples really well, and definitely will need another application but to achieve this result without boxed chemical dyes, or a trip to the salon is unbelievable given henna and indigo are 100% natural. I’m completely regretting putting myself through all those years of chemical dyes, and wish I tried this much sooner.
The ONLY downside of the henna process is the time it takes to apply and rest (it is literally a full day affair for a two-step process). It is very messy, so be sure to lay towels down on the ground, on the counter, and wear clothing you don’t care for. I wish Henna Color Lab would open up hair salons just for this. If you have stubborn grey like I do, give this a try. I think it’s worth not poisoning our bodies for.
Zahida –
I decided to color my hair using Henna due to my sensitive scalp. This is the first time that I have ever used henna and the results I got from the ‘Black Hair Bundle’ was absolutely amazing. My hair is just below shoulder length, so I ended up using 2 x packets of the pure henna for the first step and 2 x packets of indigo for the 2nd step . The instructions included in the shipment were clear and concise and the best part was I did not have to let the pure henna (or indigo) sit for 6-hours or over-night before applying to my hair. It just cuts down on the whole process unlike other henna products you read about on-line. I do suggest that you use Wen cleansing conditioner to help with the removal of the henna, rather than plain conditioner as described in the instructions. Since Wen is a cleansing conditioner and NOT a shampoo, you are able to cleanse, condition and remove the henna all at the same time without tugging your hair. After I removed the henna and blow dried my hair, it felt much thicker and has a lovely deep rich black color and amazing shine. I can’t say enough great things about this product. The Black hair Bundle is great value for money and I will definitely purchase again.
Teri B. (Los Angeles) –
By the way, may I say your product is amazing. I was just about to give up on using henna altogether, too much time involve and inconsistent results. The mixing was smooth and the fact that I didn’t have to leave it on my hair for hours really will and did make a big difference in my life. I have to use the two step process and I was able to do my hair on a Friday night from start to finish. This is the best henna on the market! A new customer for life!
Thanks again!!
natwill@mindspring.com –
I am a black woman who has been using rinses and dyes to cover my grey for the past 20+ years. This 2 Step Super-Rich Black Hair Bundle is the best all-natural hair condition, repair, shine, and color product I have seen. My hair was thinning and my scalp was flaky and dry from using dyes and relaxers. This henna bundle colored all of my grey hair, thickened my hair and gave it body, and made my scalp healthy again. I receive compliments about my hair everywhere I go.